Table of Contents
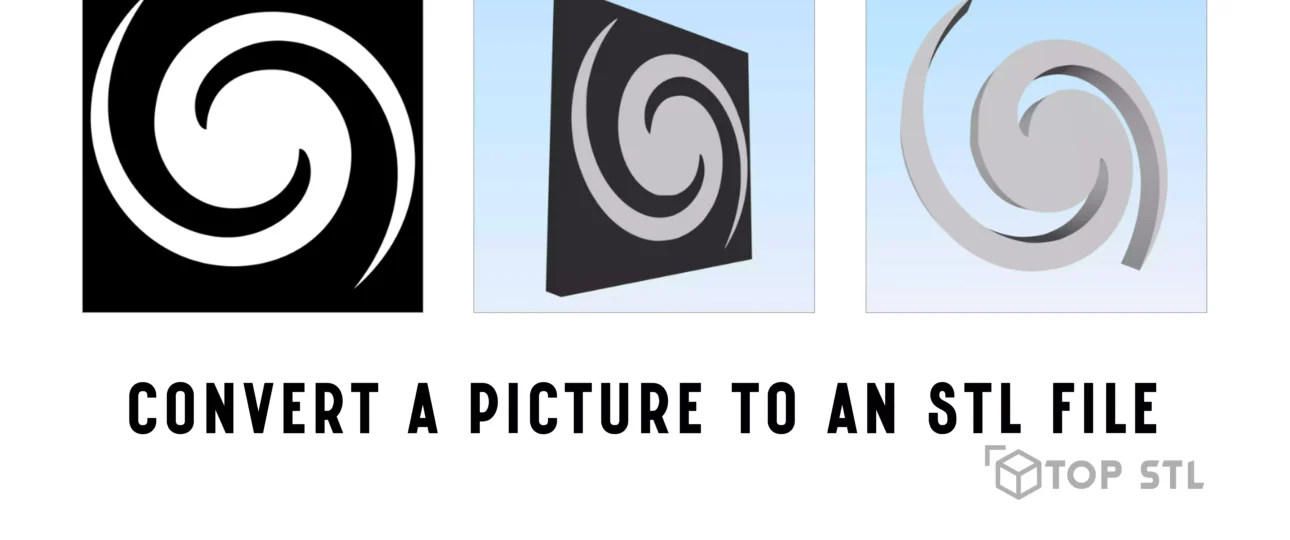
Ever wondered if you could turn a favorite photo, logo, or design into something you could touch? Converting a picture to an STL file makes it possible. With the right tools and techniques, you can take a 2D image and create a 3D object ready for printing. This guide will walk you through the steps, tools, and tips for transforming images into STL files so you can bring your ideas to life.
What is an STL File, and Why is It Important for 3D Printing?
Understanding STL Files
STL stands for StereoLithography, a file format initially created for stereolithography CAD software. Over time, it has become a staple in the 3D printing world due to its simple yet effective design, which consists of a mesh of triangles that form a 3D object’s surface. This format is widely compatible with slicing software and makes it easy to convert designs into printable layers.
Why Convert Pictures to STL Files?
Turning a picture into an STL file opens creative possibilities, from transforming a favorite photograph into a relief or turning your logo into a custom 3D object. This conversion process offers an easy way to create personalized keepsakes, artwork, and functional items that you can 3D print, giving a physical form to digital designs.
Tools for Converting Pictures to STL Files
There are several tools available for converting images to STL files. Some are free, while others are paid, and each has its unique benefits. Here’s a look at some of the best options.
Free Online Tools
- ImageToSTL.com: This free online tool makes it easy to convert PNG and JPG 2D images or logos into STL files. Designed for simplicity, ImageToSTL.com allows you to create 3D models from heightmaps and logos, perfect for 3D printing, CNC machining, or even importing into your favorite 3D editing software. ImageToSTL also has an examples section where you can see what’s possible and get inspiration for your designs.
Free Software Options
- GIMP and Inkscape: This powerful duo can help you edit and vectorize images. GIMP is excellent for preparing photos by adjusting contrast and brightness, while Inkscape transforms images into vector outlines that serve as the foundation for STL files.
- Blender: Blender is a free, open-source 3D modeling software with powerful tools for creating STL files. It’s widely used by beginners and pros alike, offering extensive options for customization and editing.
- Fusion 360 (Free for Personal Use): Autodesk’s Fusion 360 provides CAD and 3D modeling capabilities for personal projects, making it a great tool for hobbyists looking to convert images into STL files.
Paid Software Options
- Adobe Photoshop: Photoshop is useful for photo editing, letting you enhance clarity and contrast before converting the image to a 3D format.
- Illustrator: Adobe Illustrator creates detailed vector graphics, which are ideal for complex or intricate designs that you want to convert to 3D.
Step by Step Guide to Converting a Picture to an STL File
Step 1: Select the Right Image
Choosing an image with high contrast and defined lines will produce the best results. Avoid images with intricate details, as they can create complex STL files that may be hard to print. High-quality photos or line drawings work best, so pick a simple, bold design.
Step 2: Convert the Image to Black and White
Before converting the image, make it black and white to highlight the essential features. You can use software like GIMP or Photoshop to adjust brightness, contrast, and apply a threshold filter. Black and white images make it easier to define edges and shapes, essential for creating an accurate 3D model.
Step 3: Create a Vector Outline
Convert the image into a vector format (like SVG) using Inkscape or Illustrator. Vector graphics let you scale and manipulate the image without losing quality, which is vital for 3D modeling. Once vectorized, save the file as an SVG, which will serve as the blueprint for your 3D model.
Step 4: Import and Extrude the Image in 3D Software
Using a 3D modeling program, import the vector file and “extrude” it to add depth, transforming the 2D design into a 3D model. Blender, Fusion 360, and Tinkercad are all good choices for this step. Extruding is the process of giving thickness to your model, allowing it to “pop” off the base.
Step 5: Save and Export as an STL File
Once your 3D model is ready, export it as an STL file. Be sure to check your 3D software’s export settings, adjusting dimensions and resolution to match your printing needs. STL format is universally compatible with 3D printing slicers, making it easy to print once you’re finished.
Using Image ToSTL.com to Quickly Convert Images to STL Files

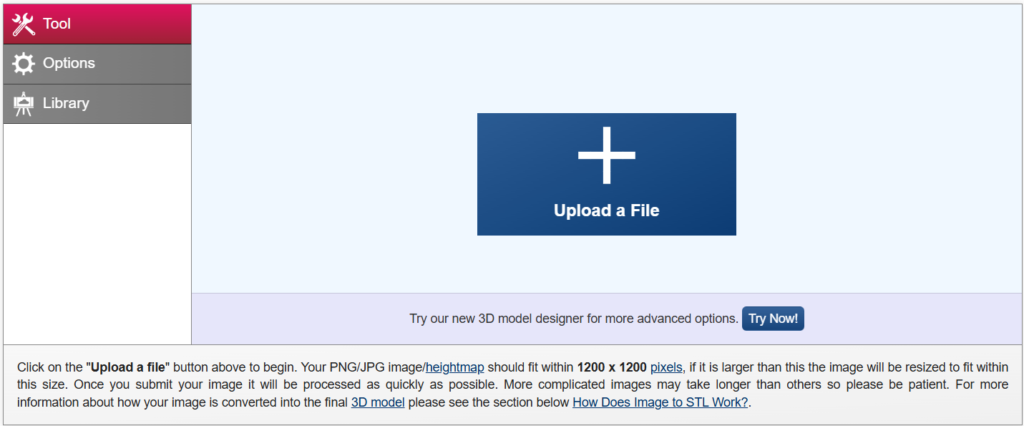
If you’re looking for a simple, no-download solution, ImageToSTL.com is an excellent tool. Here’s how to use it:
- Upload Your Image: Choose a PNG or JPG file. ImageToSTL works best with high-contrast photos or simple logos.
- Adjust Settings: Customize the height, depth, and resolution of your STL file. You can experiment with different values to achieve the desired look.
- Download the STL File: Once you’re satisfied, download the STL file and prepare it for 3D printing. ImageToSTL’s online platform makes it fast and efficient, especially for beginners looking to create simple STL models.
With ImageToSTL.com, you can go from a 2D image to a 3D model in minutes, bypassing the need for extensive software knowledge.
Optimizing Your STL File for Quality Printing
Once you have your STL file, some fine-tuning can enhance the quality of your print.
Reducing File Size and Complexity
Large, complex files can slow down printing and consume more material. Using Blender or Fusion 360, you can reduce the polygon count, making the file easier to handle and print. This “decimation” process reduces the model’s detail without compromising the overall look.
Checking for Errors
Ensure your STL file is error-free using tools like MeshLab or Netfabb, which detect and fix common issues. Smoothing surfaces and filling gaps will improve print quality, especially for complex models.
Best Practices for Picture-to-STL Conversions
Here are some tips to get the most out of your image-to-STL conversions:
- Choose High-Resolution Images: A high-resolution starting image leads to a more detailed print. Opt for images with clear details for the best results.
- Experiment with Extrusion Depth: Adjusting extrusion depth affects the 3D model’s visual impact. Shallow depths work well for subtle designs, while more depth gives a bolder look.
- Use a Reliable Printer and Filament: High-quality filament and a well-calibrated printer can make a noticeable difference, especially in intricate models.
Troubleshooting Common Issues
File Too Large or Complex
If the STL file is too complex, simplify it by reducing the polygon count in Blender. Many programs have decimation or simplification options that make files easier to print without losing much detail.
Image Quality Affects Model
Low-resolution images can result in pixelated or blurry STL files. Start with a high-resolution image and avoid excessive editing to retain quality.
Software Limitations
Sometimes, a single program might not have all the features you need. Consider using multiple tools such as using Photoshop for editing, Inkscape for vectorizing, and Blender for 3D modeling for a streamlined workflow.
FAQ
What Image Types Work Best for STL Conversion?
High-contrast images with well-defined shapes work best, especially line drawings and icons.
Is It Possible to Use Any Image for STL Conversion?
Technically, yes, but simpler images with fewer details work best. High-detail images may require more work to prepare.
What’s the Best Free Tool for Beginners?
For beginners, ImageToSTL.com is ideal, offering an easy, online option for converting images to STL without needing advanced skills.
Is 3D Modeling Experience Necessary?
Basic knowledge helps, but it’s not required. Online tools like ImageToSTL make it easy to get started.
How Do I Ensure High Print Quality?
Using a high-quality image, checking for STL errors, and experimenting with depth settings can all improve your final 3D print.
Conclusion
Transforming a picture into an STL file opens a new world of possibilities, enabling you to bring your favorite images to life. With options like ImageToSTL.com, Blender, and Inkscape, creating STL files from pictures has never been easier. Whether you’re looking to make a personalized gift, a unique decor piece, or just experiment, these steps and tools will guide you from start to finish.

